This article will discuss setting up Cisco Anyconnect with LDAP/Domain Authentication. I will be showing both the ASDM/GUI and CLI commands. I recommend the GUI method once, then use the CLI once you understand it.
Replace the following below with your own:
"10.0.1.10" with your AD/DNS Server
"DC=SDC,DC=LOCAL" with the base DN of your Domain, my domain was SDC.LOCAL
"CN=administrator,CN=Users,DC=SDC,DC=LOCAL" with the domain admin service account for your ASA, the DN of it.
"P@ss1234" The Password to the service account above.
"CN=RemoteUsers,CN=Users,DC=sdc,DC=local RemoteUsers" the DN of the Group allowed to VPN into the network.
"10.255.255.50-10.255.255.250 mask 255.255.255.0" The subnet that you want the VPN users to be assigned to.
"sdc.local" Replace with your Domain
"Access-list SPLITSUBNET standard permit 10.0.1.0 255.255.255.0" Replace with your internal subnet(s) for the split tunnel traffic.
"Anyconnect image disk0:/anyconnect-win-4.3.05017-k9.pkg 1" either add your own image from the GUI guide, or replace reference your own image.
You will also need the following NAT Rules to facilitate communication between local and client VPN subnets.
enable
conf t
object network CLIENTVPN_PRIVATE
subnet 10.255.255.0 255.255.255.0
exit
object network LAN_PRIVATE
subnet 10.0.1.0 255.255.255.0
exit
nat (inside,outside) source static LAN_PRIVATE LAN_PRIVATE destination static CLIENTVPN_PRIVATE CLIENTVPN_PRIVATE no-proxy-arp
The only thing you won’t see in here is configuring an A record or the SSL cert for the client VPN.
Enable
Conf t
Webvpn
Enable outside
Exit
Aaa-server RALDAP protocol ldap
Aaa-server RALDAP (inside) host 10.0.1.10
Ldap-base-dn DC=SDC,DC=LOCAL
Ldap-login-dn CN=administrator,CN=Users,DC=SDC,DC=LOCAL
Ldap-login-password P@ss1234
Ldap-naming-attribute samaccountname
Ldap-scope subtree
Server-type Microsoft
Exit
ldap attribute-map anyconnectLDAP
Map-name memberOf Group-Policy
Map-value memberOf CN=RemoteUsers,CN=Users,DC=sdc,DC=local RemoteUsers
Aaa-server RALDAP (inside) host 10.0.1.10
Ldap-attribute-map anyconnectLDAP
Exit
Group-policy RemoteUsers internal
Group-policy RemoteUsers attributes
Vpn-session-timeout none
Vpn-idle-timeout 9999
Vpn-simultaneous-logins 99
Vpn-tunnel-protocol ssl-client
Exit
Ip local pool SDCVPNSUBNET 10.255.255.50-10.255.255.250 mask 255.255.255.0
Webvpn
Tunnel-group-list enable
Group-policy NOACCESS internal
Group-policy NOACCESS attributes
Vpn-simultaneous-logins 0
Vpn-tunnel-protocol ssl-client
Dns-server value 10.0.1.10
Default-domain value sdc.local
Exit
Tunnel-group “SDCUsers” type remote-access
Tunnel-group “SDCUsers” general-attributes
Default-group-policy NOACCESS
Authentication-server-group RALDAP
Address-pool SDCVPNSUBNET
Tunnel-group “SDCUsers” webvpn-attributes
Group-alias SDCUsers enable
Exit
Access-list SPLITSUBNET standard permit 10.0.1.0 255.255.255.0
Group-policy RemoteUsers attributes
Split-tunnel-network-list value SPLITSUBNET
Exit
Webvpn
Anyconnect image disk0:/anyconnect-win-4.3.05017-k9.pkg 1
Anyconnect enable
Exit
http redirect outside 80
group-policy RemoteUsers attributes
split-tunnel-policy tunnelspecified
exit
Now here’s how to do all of this from the GUI/ASDM.
Let’s first create the NAT rule necessary to facilitate communication with our LAN and the Client VPN subnet.
Here are the network objects and NAT rule.
Configuration > Firewall > objects > network objects
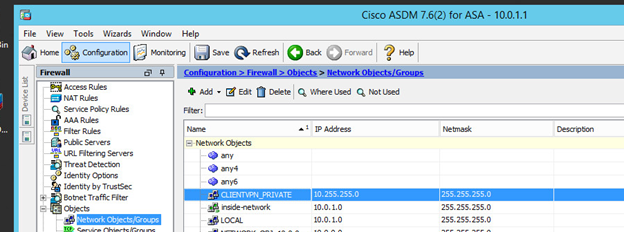
Configuration > Firewall > NAT Rules
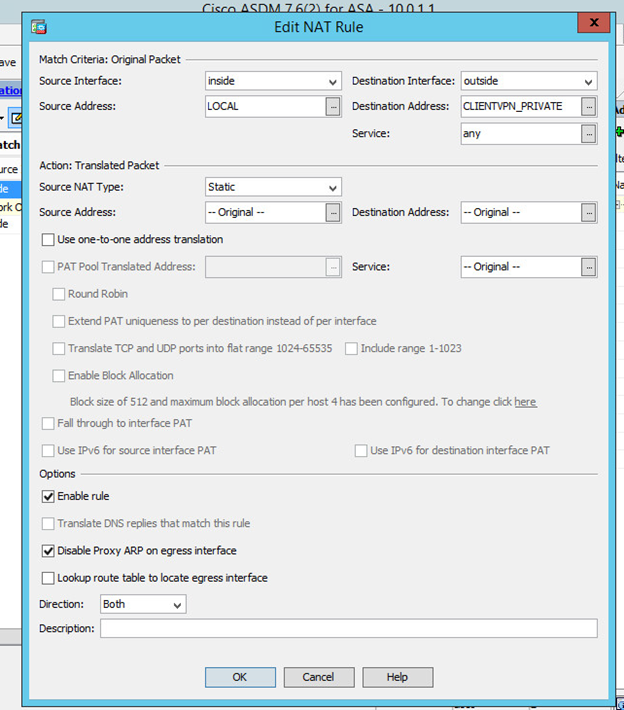
Here is the order of the NAT Rules.

Ok, now go get the latest anyconnect .pkg for Windows from Cisco.com

Great now let’s go back into ASDM so we can configure Anyconnect.
Head over to the configuration, Remote Access VPN tab. Then enable the following:
Check “Allow Access” on outside
“Bypass interface access…”
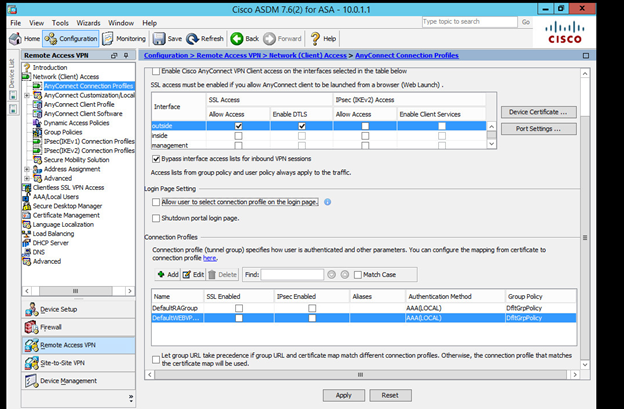
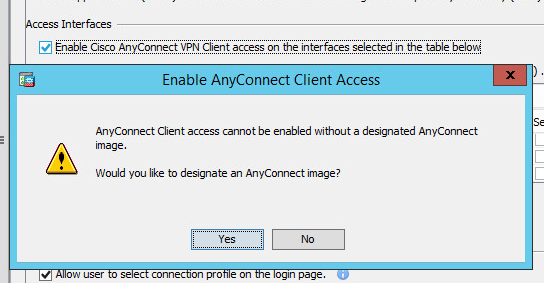
Also, select the “enable cisco anyconnect VPN…” and upload the .pkg image we downloaded. Do this by clicking yes to the prompt about designating the anyconnect image. Then Upload your image, finally click okay once it’s autoselected.
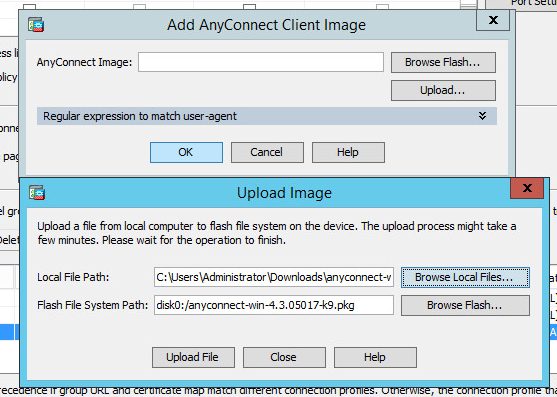
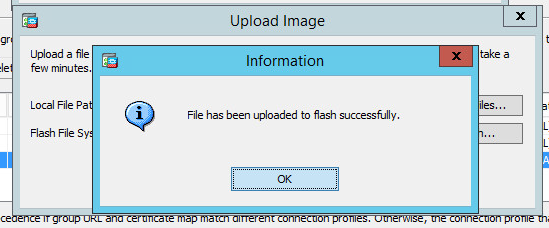
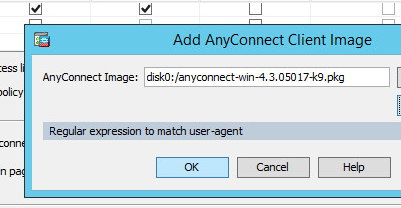
Now head over to the AAA column menu

We first need to create the LDAP server group and attribute MAP for our connection profile.
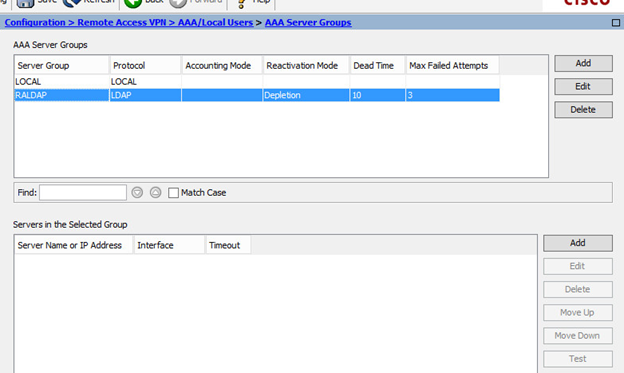
Click “Add”

Set it to the following
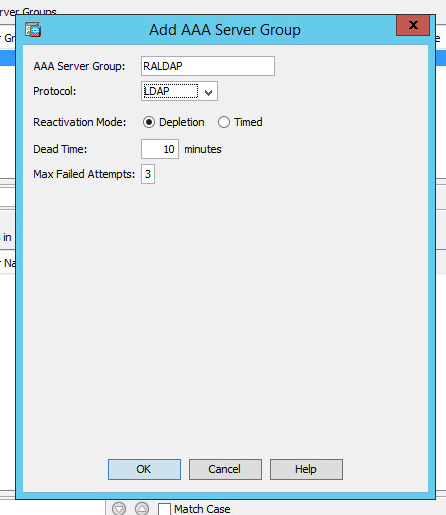
Click ok and then click “add” in the bottom server group tab
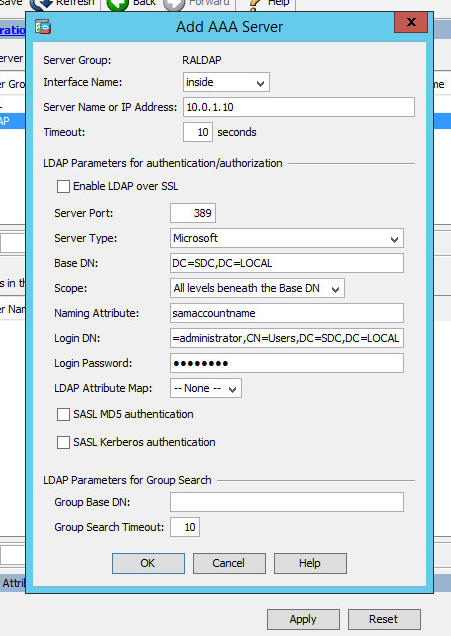
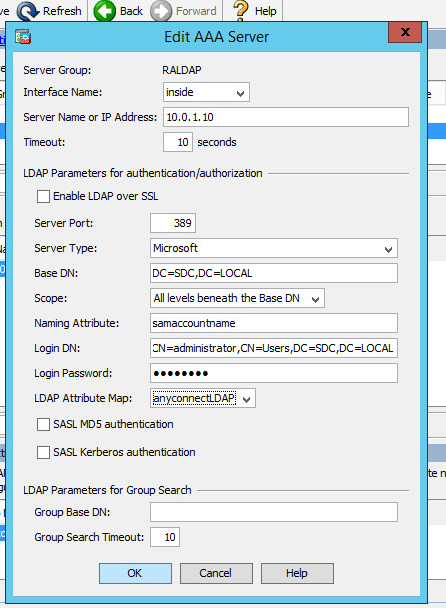
Fill out the following page, don’t forget to create a service account for the ASA. Of course replace the IP with your AD server’s IP.
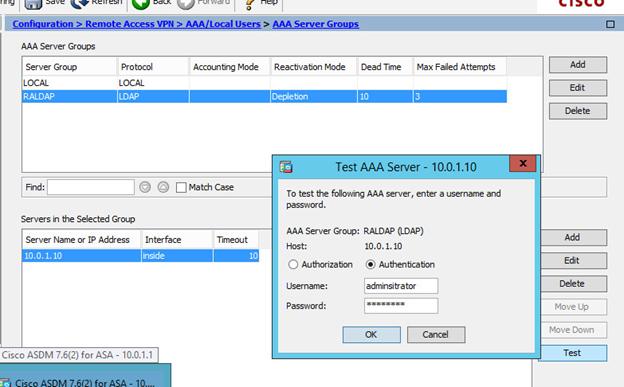
Don’t forget to test your server, click Test which is the last item in the right column and enter domain creds to test.
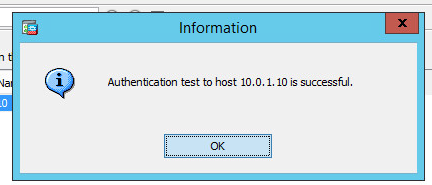
You should see a success.
Now click the LDAP MAP Attribute bar
![]()
It will expand the window, now click add

Name it “anyconnectLDAP” set the attribute to memberOf and the Cisco attribute to GroupPolicy and click add.
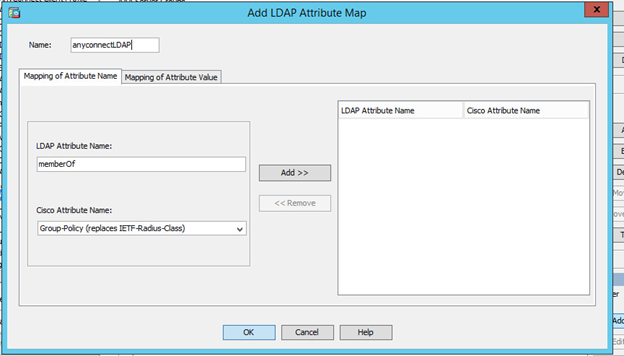
Then head over to the mapping of attribute value tab and click add
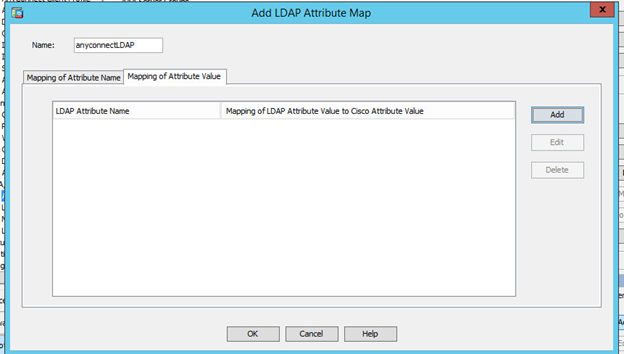
Put the FULL DN of the AD group that will have remote VPN users in it. Make sure to not nest groups in there. Here’s the DN I used.
CN=RemoteUsers,CN=Users,DC=SDC,DC=Local
Then set the cisco attribute to “RemoteUsers”. Doing this means that any user of that group gets assigned the group policy of “RemoteUsers” which we will create later. Finally click “Add” then “OK”.
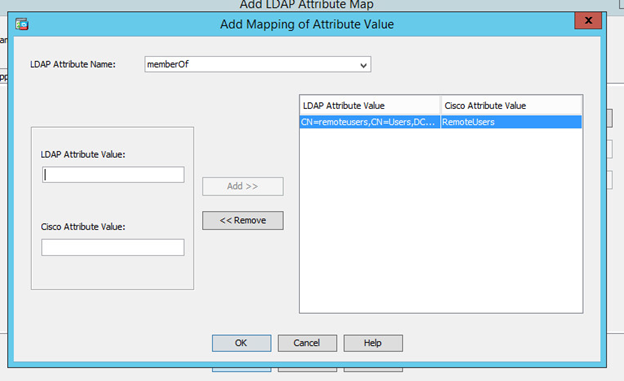
Then click ok to the final window.
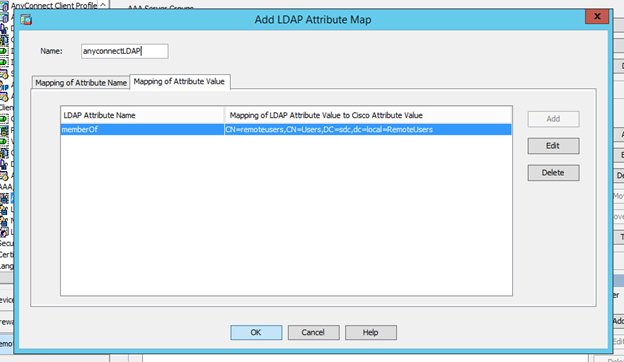
Now go back, edit your LDAP server group, and set the LDAP attribute MAP that we just created as the one for that server group.
Side tangent:
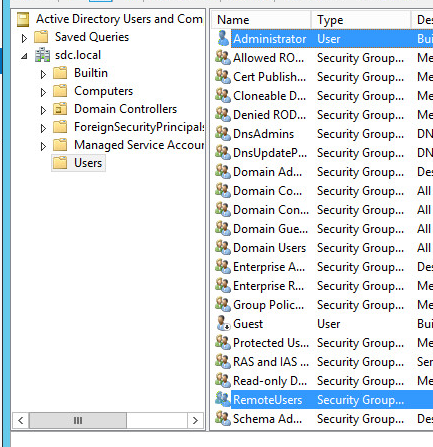
Also, here’s a screenshot of the group and user I used for the LDAP connection and attribute map.
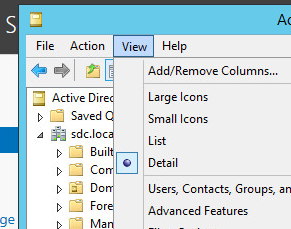
If you are not familiar with distinguished names, I suggest you enable advanced views in dsa.msc and then go into the attributes of your object, the distinguished name will be there. Here’s how to do that.
Dsa.msc > views > advanced features
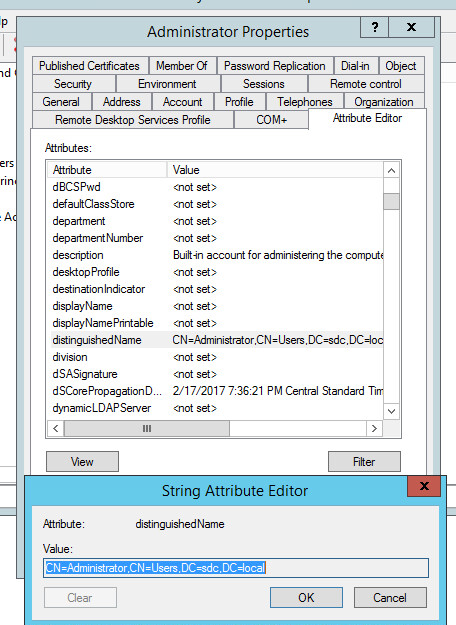
Then browse to the object properties > attribute editor > find distinguished name
Ok back to the ASA config.
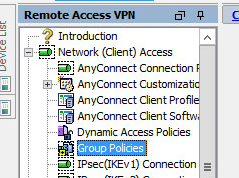
Now head over to the Group Policies Tab and click Add.
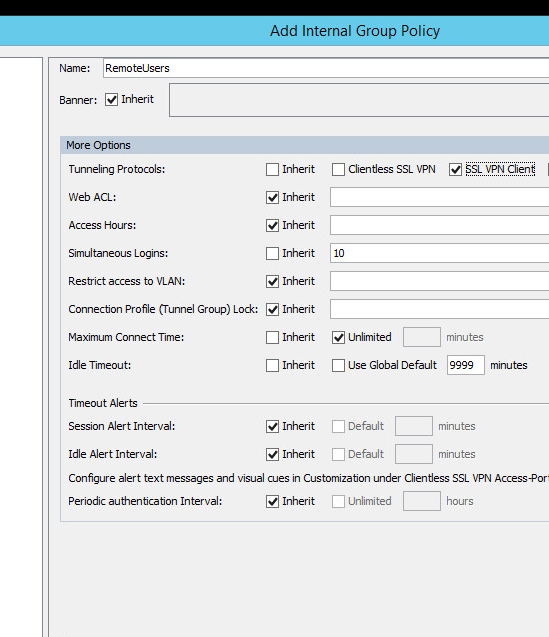
Name the GP “RemoteUsers” remember this is going to be assigned via the LDAP attribute map. Also set the following settings. NOTE IT’S VERY IMPORTANT TO SET A SIMULTANEOUS LOGIN!
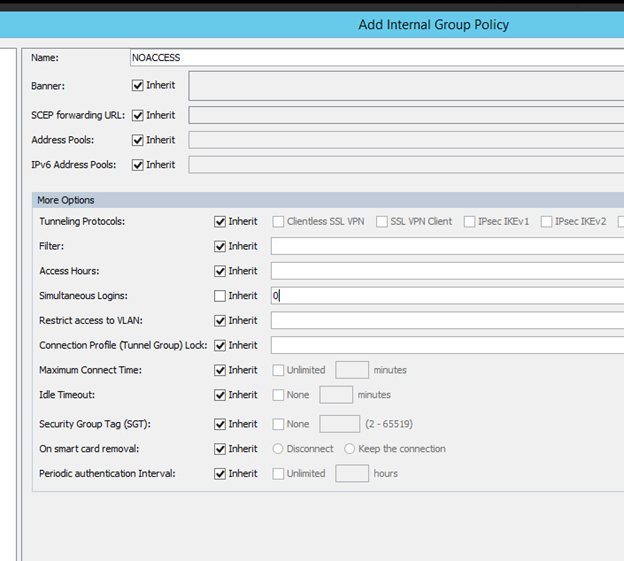
Then click OK to close out the menu. Now we need to create a GP named “NOACCESS” with the following settings (0 simultaneous users)
Click Ok to save that too.
Now head over to connection profiles and add a new profile
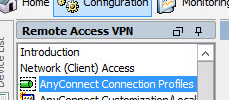
Create a profile, preferably one with a name/alias your users will recognize.
Be sure to select the AAA group created earlier, set the internal DNS and set the GP to “NOACCESS”. The LDAP attribute map we created earlier will dynamically assign the GP when the user logins. Also set the subnet/dhcp settings that you want.
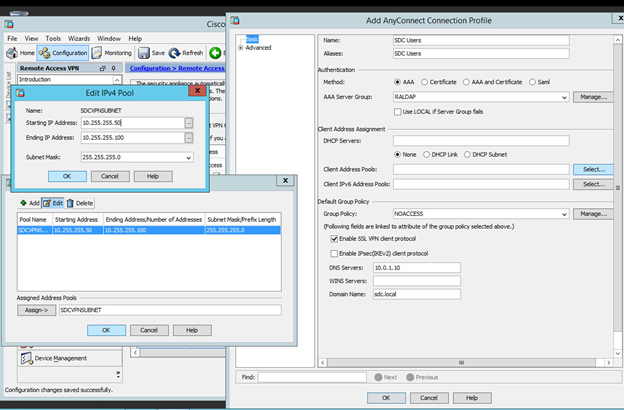
After saving the profile, it should auto enable. Make sure to check the box in the original window to allow users to select their own profile. (helpful later if you setup multiple profiles, or webvpn)

An important, and usually implemented feature of client VPN solutions is split tunneling. This feature lets you choose what traffic should and should not go over the tunnel. If we don’t configure this ALL traffic goes through the client VPN. This can severely impact the environment if there isn’t enough bandwidth available.
Now let’s go back to the “Remote Users” group policy we created. Edit the policy, and go to the “split-tunneling” menu.
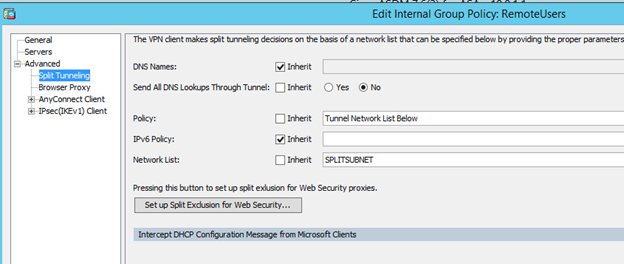
See the network list I just unchecked? Click “Manage” to the right of that and create a standard ACL. Then add the subnets that client VPN users will access over the VPN.
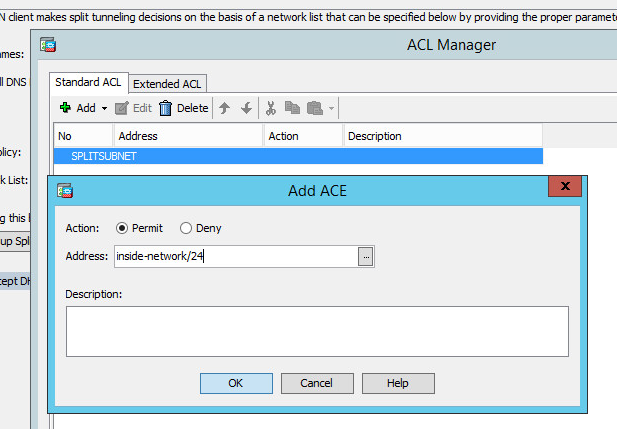
After clicking OK
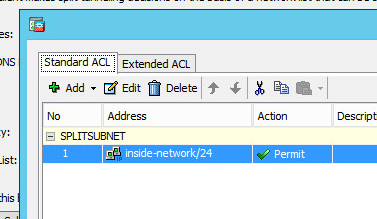
After closing that menu
![]()
Now click OK in the last window to close all of that out.
Finally let’s setup HTTP to HTTPS redirection so that when users browse they will be redirected.
Configuration > Device management > Advanced > HTTP Redirect > highlight Outside interface > click edit > check redirect checkbox > click ok > Apply settings
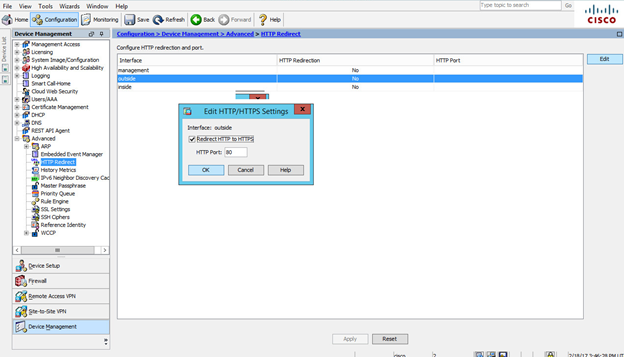
Ok we’re all done! Let’s test it now! I’m doing this all from a virtual lab with a simulated WAN.
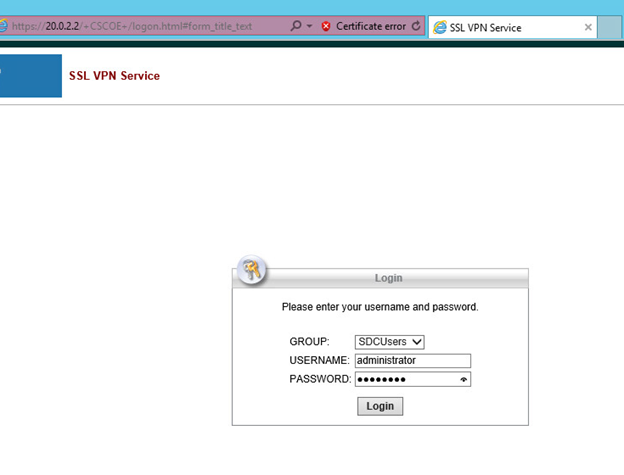
Looks like it worked because I was asked to download the anyconnect package.

Let’s install the client.
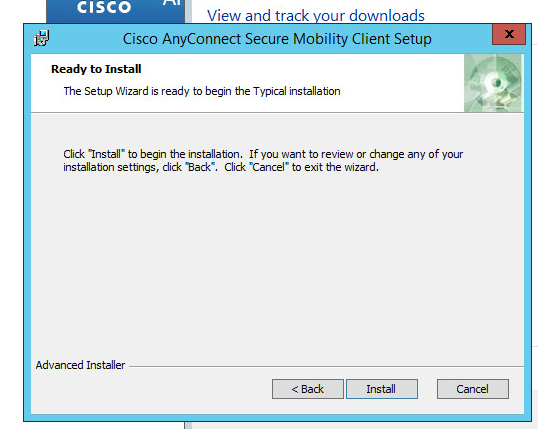
Now since we don’t have a publicly trusted SSL cert, we are using the default self signed one. So we need to go into anyconnect to uncheck the “block” box below to allow us to connect.
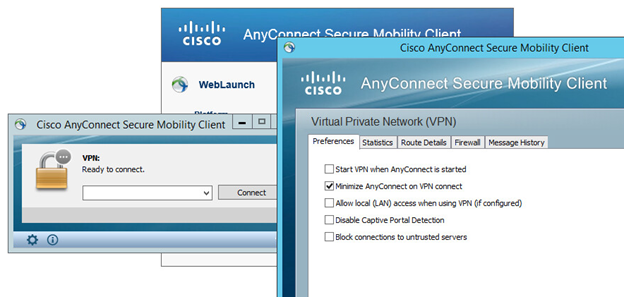
Now let’s connect.
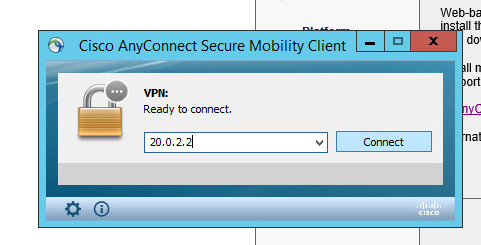
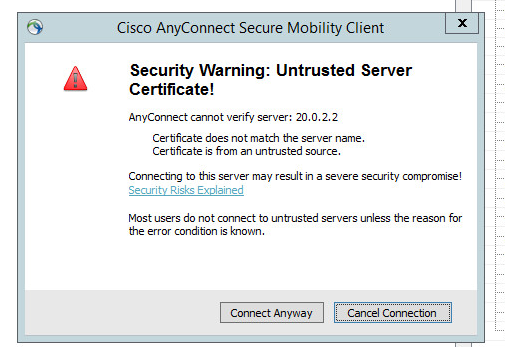
Notice the SSL error, just click continue.
Ok now let’s authenticate with LDAP
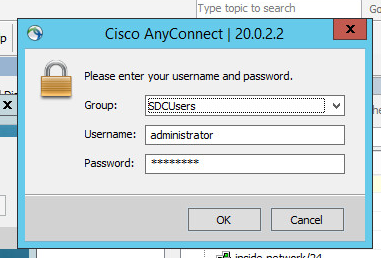
Looks like it accepted.
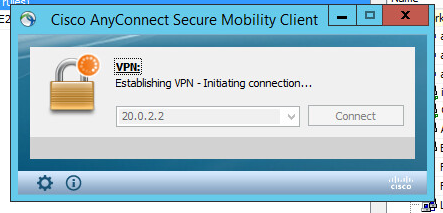
Don’t forget to verify that the split tunnel is working
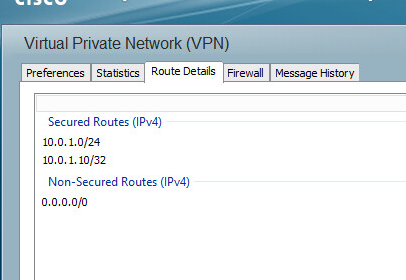
Awesome!
Troubleshooting
If for whatever reason LDAP auth failed, use the following debug commands to figure out what went wrong in the ASA.
Debug ldap 255
Debug aaa common 255

The biggest issue I see with the above is something with domain auth not working properly. Then the user is denied a login because the default group policy is NOACCESS. Then I see people just edit the noaccess policy to allow users in, I HATE THAT. Check the distinguished names, make sure the DN isn’t too long (some versions hate that). Use the freaking debugs. The LDAP group should be translated via the attribute map to a proper group policy, you can verify if it’s not via the debug.