Now I’m just at the beginning of my powershell journey however I’ve discovered a couple of tricks that really help me solidify my scripts:
- The first tip is to use “get-command *yourmodule*”
The first step in any one of my powershell scripts is first figuring out, what is possible with powershell CMDLETS.
This is why I use get-command, because it shows me all the commands available for the task I want to do. Let’s say I want to work with DFS.
I would start off by typing “get-command *DFS*”. This is like typing “get-command | where-object name -like “*DFS*”
Now any command with the three characters “DFS” in it will output.
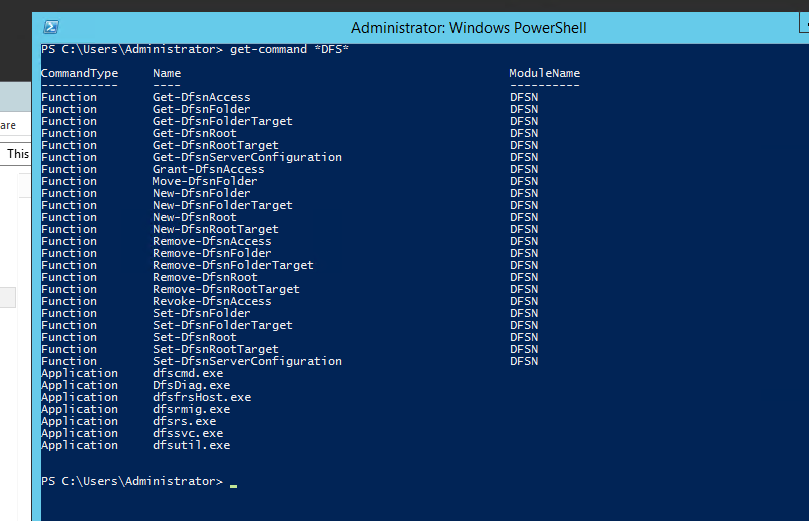
Now I know exactly what commands I can work with. If I just installed these roles I know I want to create a DFSNroot, I just don’t know how. So now that’ll lead to our next tip
2. get-help yourcommand -showwindow
Now I’ll type “get-help new-dfsnroot -showwindow this will display the help dialog in a new window so you can move it to the side.
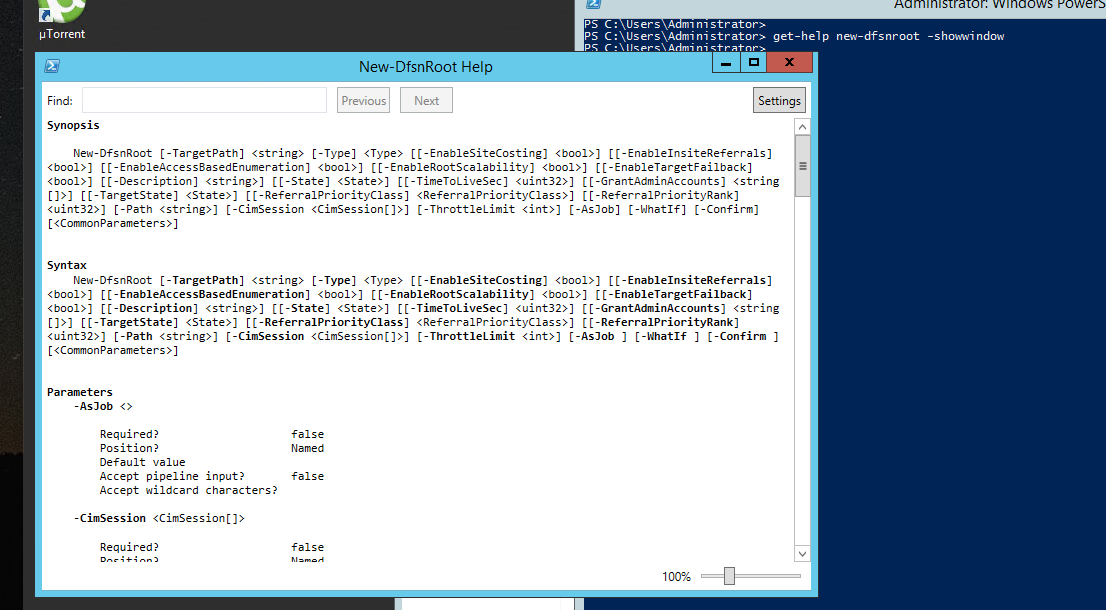
Now that’s a lot of syntax. But you should know that only Targetpath and Type are required because if we scroll down for paramenters, it will tell us Required? True.
But what if we’re still unsire how to do this? Well next I like to visualize it by using our next tip.
3. Show-command yourcommand
Show-command will open a gui window for you to visualize exactly what you need and how to construct your command.
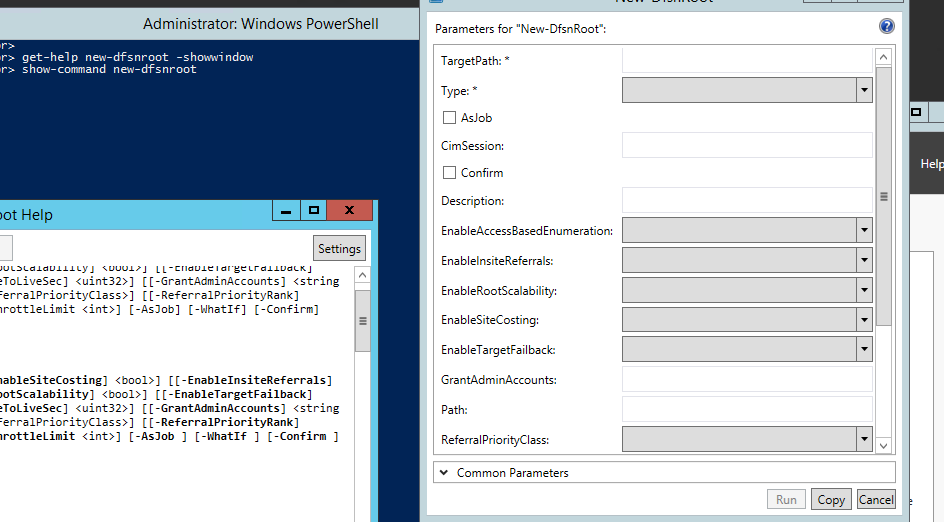
Now I see that targetpath and type are required, I can even click through to the drop down to create my command. Then I can click copy, or run!
Now I can just fill this out and copy it to my script. You can mess around with the settings or even lookup what each parameter does!