Anyone who talks nerd with me knows I love my subscription to Cisco VIRL.
However at some point in your lab you will find that you want a Server 2012/2016 VM, or you just want some dam network connectivity in this lab.
Have no fear, flat networks are here. (They always have been).
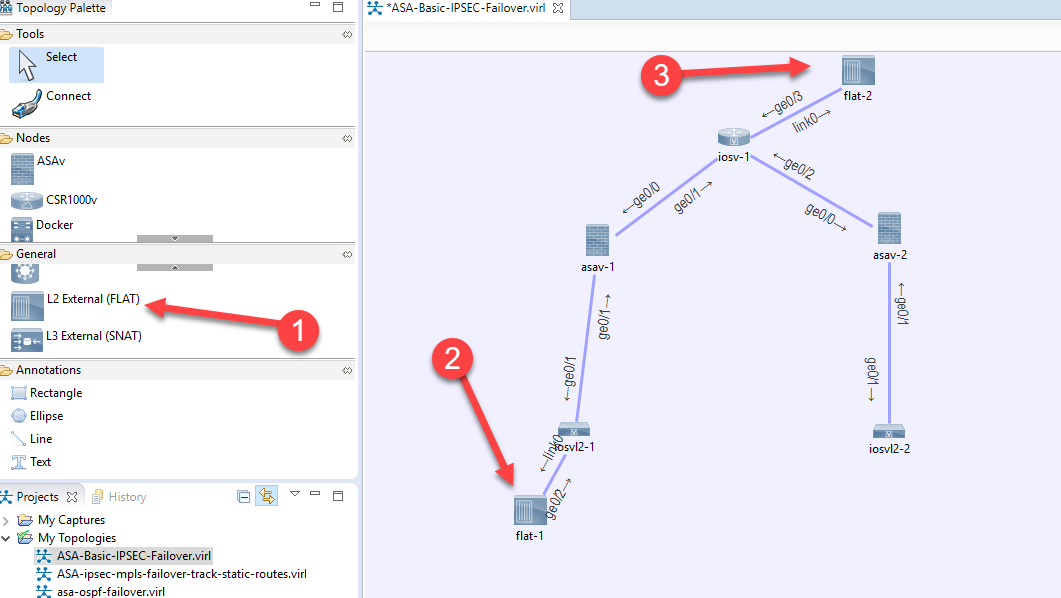
Step 1: Drop two “L2 External” nodes onto your topology, I put Flat 1 on my switch, and Flat 2 on my cisco WAN router (for wan connectivity)

Now how does this connect to our real network? Well through the flat vswitch port groups we had to create when initially installing VIRL from the official guide.
Here’s a refresher…
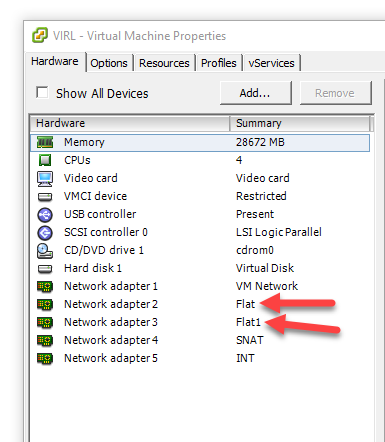

The “flat-1” node maps to the “Flat” vswitch port group, and the “flat-2” node maps to the “Flat1” vsiwtch port group.
Now since I put Flat-1 on the switch, this is supposed to be my VM so I’ll set my VM’s port group to “Flat”.
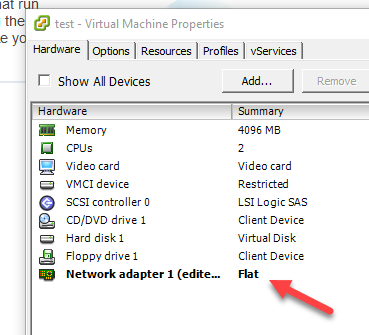

That’s it for the “test” VM it should now be connected to that L2 node via the port group.
Part 2:
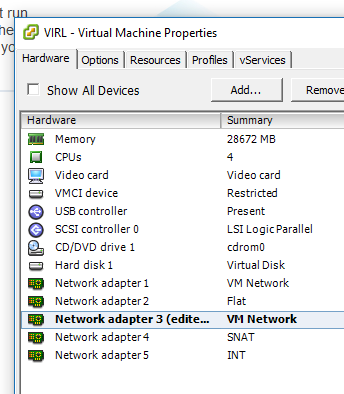
Since I put Flat-2 on my pseudo Wan router in VIRL, I want that to provide internet connectivity. So I set the Flat2 portgroup to be on the “VM Network” which is my LAN.

I like using a WAN router like this in my topologies because it simulates a real WAN link. The alternative to this is to just connect all the WAN links into a L2 unmanaged switch but then they would be all on one broadcast domain. In that scenario the spoke sites would not require default routes out to the “Internet”. I also like the idea of being able to connect as many spoke sites as I want into this WAN router and just have them all get internet connectivity. I like to simulate as much as possible so for me this is a no-brainer.
On my WAN router I do something like this to provide outbound connectivity.
conf t

int g0/3

ip address dhcp

ip nat outside

exit

int g0/2

ip add 1.0.0.1 255.255.255.252

ip nat inside

exit

int g0/0

ip add 2.0.0.1 255.255.255.252

ip nat inside

exit

ip route 0.0.0.0 0.0.0.0 dhcp

access-list 1 permit 10.0.0.0 0.255.255.255

access-list 1 permit 172.16.0.0 0.15.255.255

access-list 1 permit 192.168.0.0 0.0.255.255

ip nat source list 1 int g0/3 overload
That’s it, now this router will provide wan connectivity for all. The NAT is of course required because the return traffic from my LAN won’t know where to go (don’t feel like adding routes to my firewall). Also since all sites will be directly connected to this routed I won’t need any static routes between them.
If you’re interested in more Cisco stuff , click here!
For Cisco Virl resources see the Cisco Virl forum, click here!